Using the Soot Eclipse plugin
Eric | August 30, 2008After my last tutorial on using Soot on the command line, this is the second of a series of blog posts about frequently asked questions with using Soot. Today’s topic will be on Soot’s eclipse plugin.
Installation
To install the latest version of the plugin, start Eclipse and click on:
Help -> Software Updates -> Find and Install
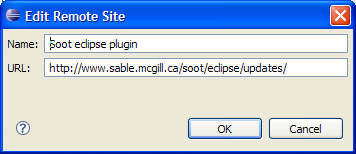 Select Search new features to install and add a new remote site for this URL:
http://www.sable.mcgill.ca/soot/eclipse/updates/
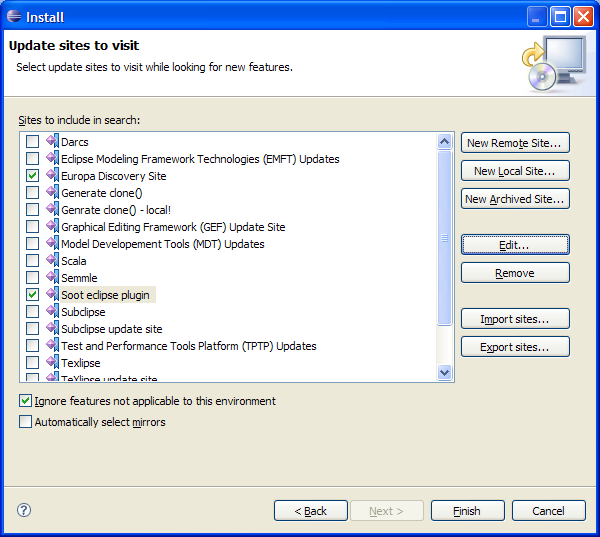 Select the newly created remote site and the Discovery Site for your Eclipse version. Then click Finish.
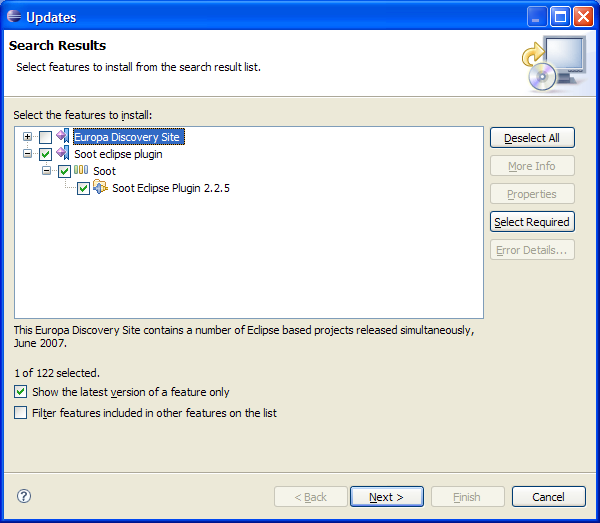 Select the Soot plugin form the list. If eclipse complains that it cannot find Draw2D or GEF, also select Graphical Editors and Frameworks from the Eclipse Discovery Site.
Click Ok and restart Eclipse.
Setting up a project so that Soot can work with it

So that Soot can work with it, an eclipse project should have a structure as shown on the right, where source files reside in source folders like “src” and class files go into a dedicated “bin” folder. Soot will automatically regard the project’s source path and classpaths.
Transforming files between different (intermediate) representations

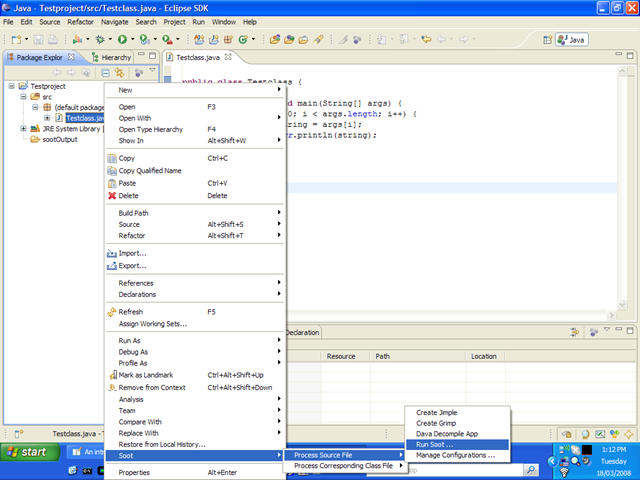
The eclipse plugin makes it easy to convert Java source files or bytecode files into the Jimple or Grimp intermediate representations, and even to convert back from those representations into source code or bytecode. Simply right-click on the file and select the appropriate option.
 You can also process an entire project. Select Project->Soot …
 Soot places the generated files into a folder “sootOutput” in the current directory. It also shows its progress in a console view.
Displaying the results of a data-flow analysis
Soot can display the results of a data-flow analysis using three different kinds of tags:
- StringTag – shows a string when you hover over the tag with your mouse
- ColorTag – highlights the tagged Stmt or Value with a color
- LinkTag – lets you jump from the tagged Stmt or Value to the line of another Stmt by clicking on the source Stmt or Value
Soot displays these tags right in line with the generated code and with the source code. For instance right-click the Testclass and select Process Source File –> Run Soot…. Now sel ect Output Options and select Jimple. Under Phase Options/Jimple Annotation Pack activate the Reaching Defs Tagger and click Run. If you now re-open Testclass.java then you should see something like shown on the right-hand side. If you like, you can add all kinds of tags in your own analysis. You can add tags to anything that implements the Host interface.
Debugging a data-flow analysis
Assume that we want to use the Soot plugin to analyze the Testclass shown in the figure.
public class Testclass {

	public static void main(String[] args) {
		for (int i = 0; i < args.length; i++) {
			String string = args[i];
			System.err.println(string);
		}
	}

}
 We therefore right-click on the source file and select :
Soot -> Process Source File -> Run Soot…
 We further wish to visualize the data flow analysis that Soot performs. In the dialog we therefore enable the Interactive Mode.
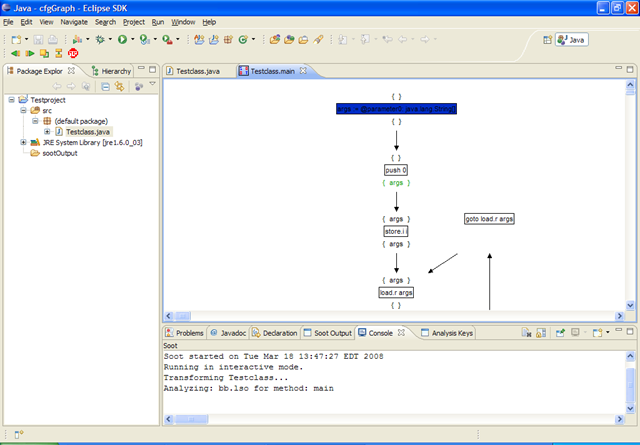 In result, Soot will show you for each method it analyzes the method’s control flow graph, along with the analysis information that is computed. In the figure we see results for the load-store optimizer (as indicated by the console output).
Storing configurations
 As you have seen, the dialog to set up the Soot’s phase options has very many options indeed and it may make sense to reuse some of the options you set later on. You can do so by storing a “managed configuration”. Simply choose Manage Configurations instead of Run Soot and you will be presented the dialog on the right. You can create new configurations, edit existing ones, etc. You can also run a stored configuration from this screen.
Extending Soot (by Example)
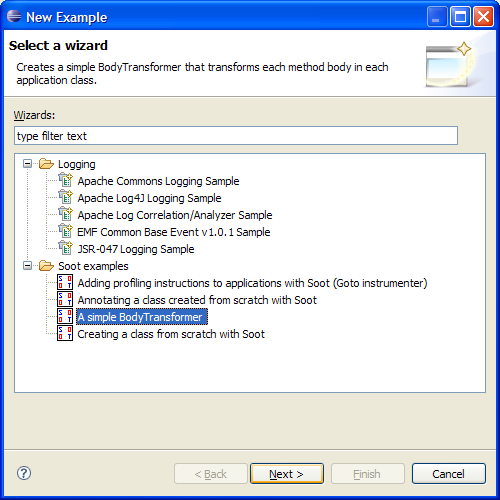 Extending Soot is easy and using the plugin we even provide concrete Examples within Eclipse. Click
File -> New -> Example..
and select one of the examples, e.g. A simple BodyTransformer.
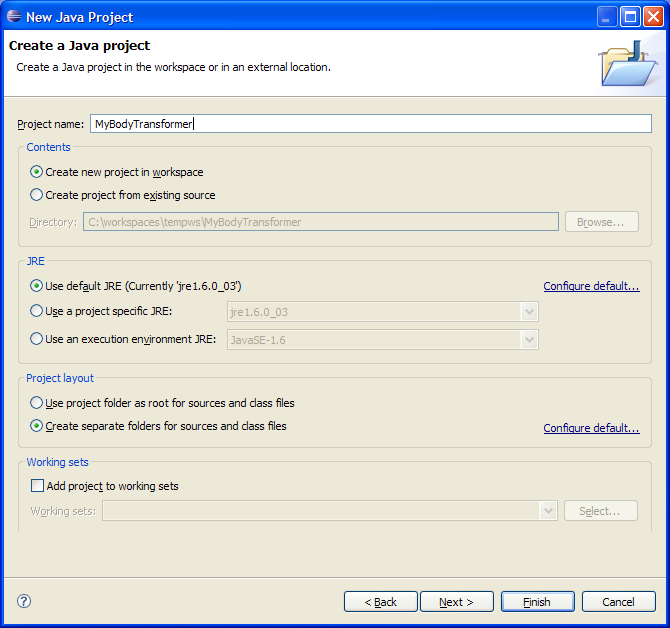 Soot will create a new Java project to host the example. Enter all necessary information for the project.
 Eclipse will then automatically show the example file.
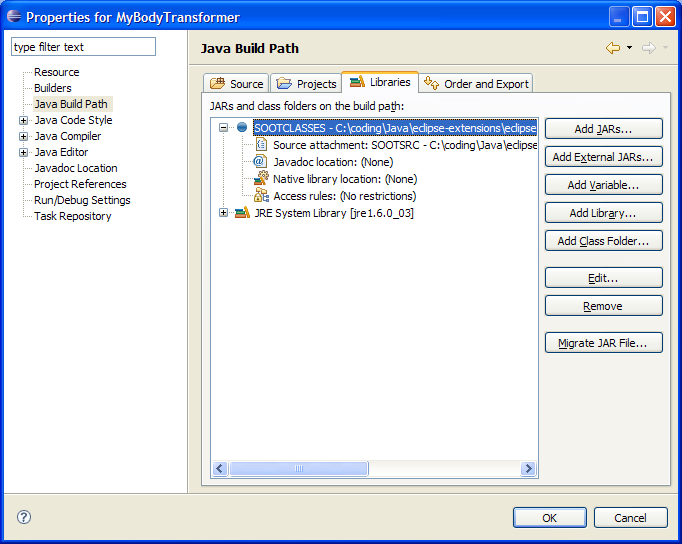 Note that the file accesses types like PackManager which are part of the Soot library. How does the project get access to that library? The Soot plugin automatically provides the build path variable SOOTCLASSES that points to soot’s library. For example projects, this variable is added automatically. If you want to extend Soot without using an example project you can just add the variable by yourself. (right-click on your project and select BuildPath)
Assume now that we want to apply our new BodyTransformer to the Testclass class, as before. Again, right-click on Testclass.java and select, as before:
Soot -> Process Source File -> Run Soot…
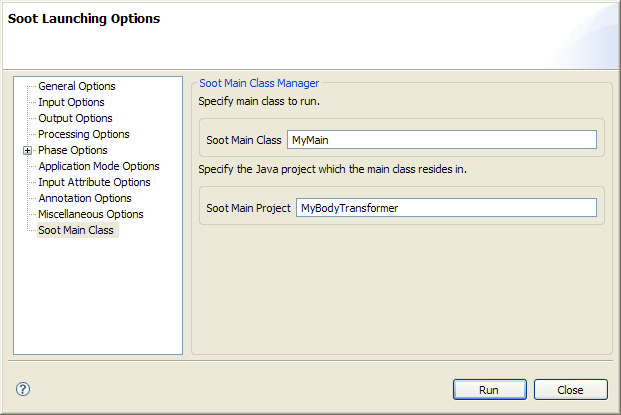 Only this time select the Soot Main Class tab and set the values as shown in the Figure. This advises the plugin to start Soot by calling MyMain in project MyBodyTranformer. The console view will now show that the customized BodyTransformer executed.
This is all for today (yes)


